✸ digicard guide ✸
i made this template after the AI linktr.ee debacle of June 2026. there is absolutely no need for such a simple thing as a page with a bunch of links to you elsewhere to be bound to a company, with everything that entails. this template is designed to look nice and simple, without any frills.
if you have any feedback or requests, you can email me at clem@krzchn.net or leave a comment at the bottom of this page.
live demo
✸ what you'll need:
✸ Step 1: setting up neocities
Go to neocities, create your account, and pick your url. The url to reach your digital card will be smth like yourname.neocities.org. If you want a custom URL (one that doesn't end in neocities.org) you will need a custom domain and a premium account, which i won't get into in this guide - it isn't free!
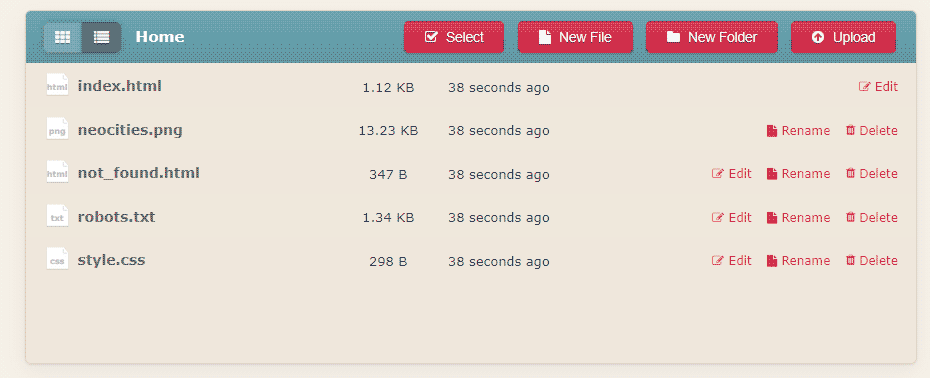
Congratulations, you now have a website! in the top right menu, choose 'edit'. This will bring you to your dashboard, which shows all the files that make up your website. You will notice that neocities generated a bunch of files automatically.
Unzip the compressed folder you have downloaded, and drag all of its content onto your neocities dashboard. it should automatically update the files with the same name (index.html and style.css) as well as add a new folder called src, which contains the files needed for the social media icons to work.
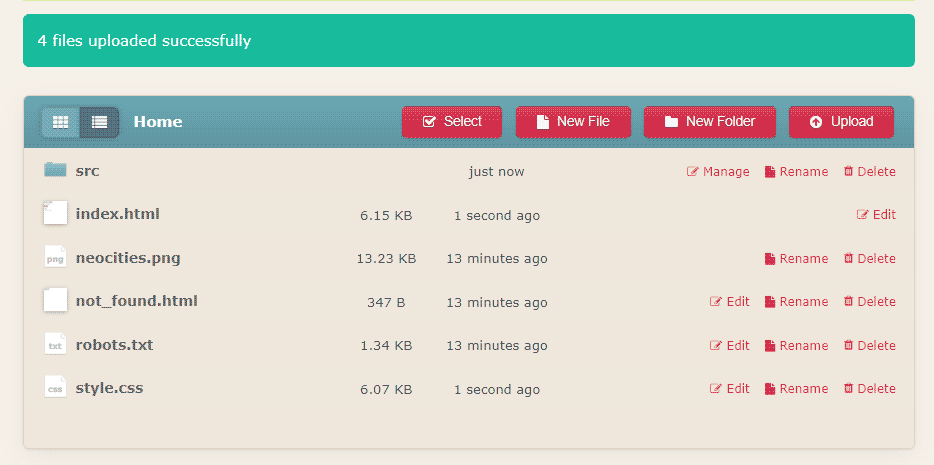
You should also upload the profile picture you have chosen. You can drop it in the root folder (where index.html is)
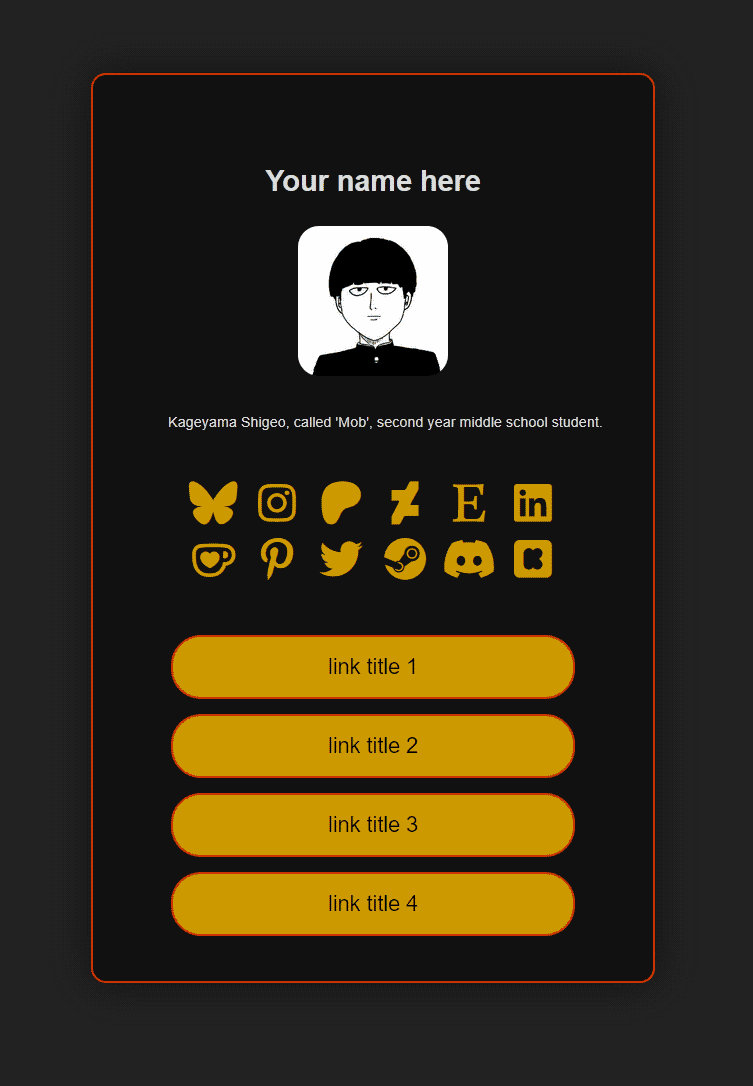
If you click on index.html, it should open the page in your browser. If everything went according to plan, it should now look something like this:
✸ Step 2: add your info to the page
First, we will edit the information the card contains so it's yours. Don't worry about the way it looks for now, we will tweak that after!
On your neocities dashboard, hit the edit button for index.html - this opens the code editor. I personally find it most comfortable to keep the code on one side of my screen, and the page open in another tab. That way, I just hit save in the editor, and then refresh the tab with my page, and i see the results rly quick without having to tab out.
Now we can go through the code and edit the parts needed. I've left comments to help you navigate the html and understand what each element is, and everything you would want to replace is in UPPERCASE for easy spotting!
A note about comments: in html, the browser will ignore any code put in between these tags <!-- this is a comment -->. I've used those liberally to include code that isn't active until you remove the <!-- --> comment tags around it. When i say 'uncomment', this is what i mean. You can also add comments tags around code you don't need, without deleting it - in case you might want to use it later!
Here is a checklist of things to change, from top to bottom:
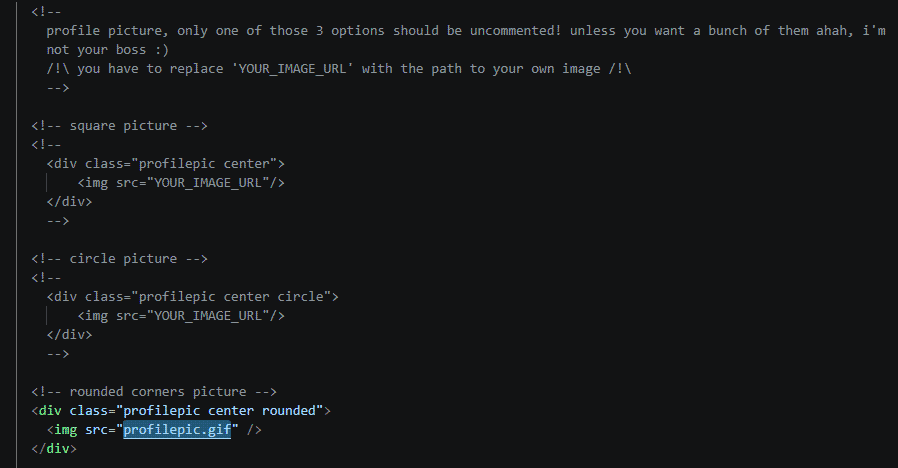
Here is mine as an example, i'm using a rounded corner picture, and the image file is in the root folder, called profilepic.gif
That's it! Now all the content is set to your own links. Next, we'll customize the look of the card!
✸ Step 3: make it fancy
Now that the content is all set, we can tweak the look of the card. To do so, click on the edit button for the style.css file (just like you did with index.html in the previous step)
Just like the html code, i've left a lot of comments to help you understand what the lines do, should you want to. but if you're happy just changing the colours, editing the variables at the top of the document in the :root section should be enough!
Again, i've kept some optional content in between comment tags (like border for the card, for example). css comment tags are different from html, they're like this: /* this is a comment */
Here is a visual guide to what the variables mean (right click > open image in new tab to see it in full):

✸ Adding your own background image
You want a custom background image? easy enough to do!
The first one is to set a background picture for the whole page (behind the card), and the second will fill the card itself with the picture. uncomment the one(s) you want to use, and replace its IMAGE_URL_HERE with the path to the image you uploaded. if your file is in the same folder as style.css, this will just be smth like url("imagename.png")
Scroll down to either the body section, or the #card one depending which you want to use, and uncomment the line here to activate the background.
Save your css file, and that should do it!
Ps: if you're fond of the 'old net' look, here are some libraries of tileable pictures:
sadgrls tileable pictures library // background-tile.com
✸ Custom fonts
You can totally get by with the standard fonts (arial, helvetica, times new roman...) that are installed on most devices. But if you want, you can add custom fonts to your card.
First option - upload the font files to your neocities folder
First, we need to find our font. I like fontlibrary, although their import system doesn't work so you have to download the fonts and put the font files on your website manually. On the plus side, this makes your website a little more futureproof since you have full control over where the font file is hosted.
Getting the font file is pretty straightforward, find a font you like on the website, and on its page there's a download button.
Once you have uploaded your font file to neocities, open style.css in the editor
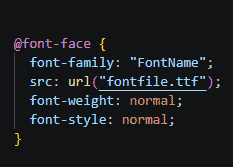
At the beginning, before :root, i've put a block in comments that allows you to direct your css to your font file. uncomment it, and change FontName to the name of your font (you can pick anything, this is just what YOU will call it when you want to use it) and fontfile.ttf with the path to your font file.
You can now use the name of the font you've imported where you want it to be used. I would recommend adding it as the first option of the corresponding variable in the :root section of your css - --titlefont, --basefont or --linkfont.
Save your css, reload your page, your font should now appear on your card!
Second option: use Google Fonts to import a font from their server
Although i'm reluctant to suggest any google product, they do have a good selection of fonts...
Browse Google Fonts. Once you found the font you want, click on the 'Get Font' button on the top right of its page. Note that you can also download the files, and then upload it to your website like we did for FontLibrary. But here we're interested in the first option, 'Get Embed Code'
If your font has several styles, I'd recommend unticking all but the one you want to use (unless you understand what a CSS class is). On the right hand side, select @import instead of <link>. In the first box, copy the line that starts with @import (ignore the two style tags!)
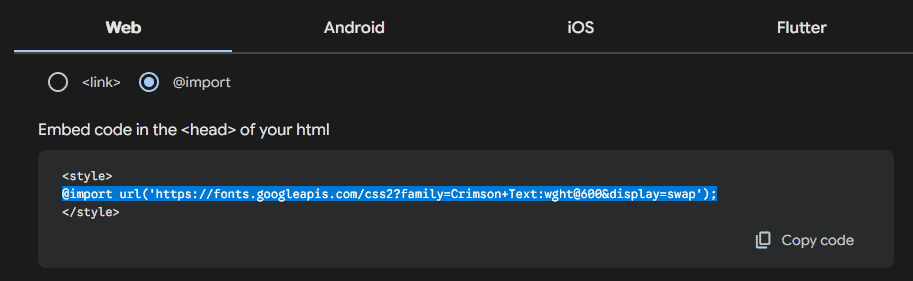
Paste it at the beginning of style.css, before the :root section. this tells your css where to find the font file.
We're not going to use the CSS classes google is giving us, but you should take note of the name of the font as seen in this line. This is the name you need to use when you want to use this font.
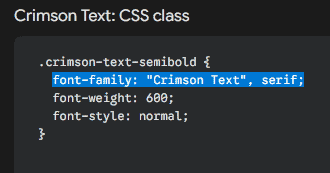
You can now use the name of the font you've imported where you want it to be used. I would recommend adding it as the first option of the corresponding variable in the :root section of your css - --titlefont, --basefont or --linkfont.

In this example, i want to use my newly imported font 'Crimson Text' for the title of my card.
Save your css, reload your page, your font should now appear on your card!
✸ closing thoughts
another pro of this setup is that if one day, neocities falls, for some reason, you only need to grab your files and host them elsewhere, it will all look and work exactly the same.
if i was an awesome programmer i would've created a tool generating the css for you after picking options from a bunch of menus, but alas, i am not! if you have any comments, or feedback, or simply want to show what you did with this template, feel free to write a comment below, or reach out to me via email.
if this guide is useful to even one person, my job here is done! :>